
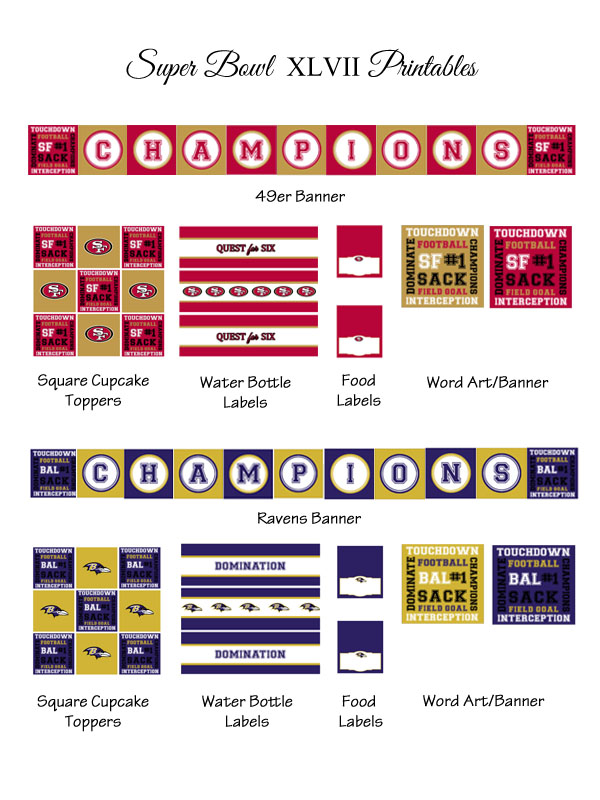
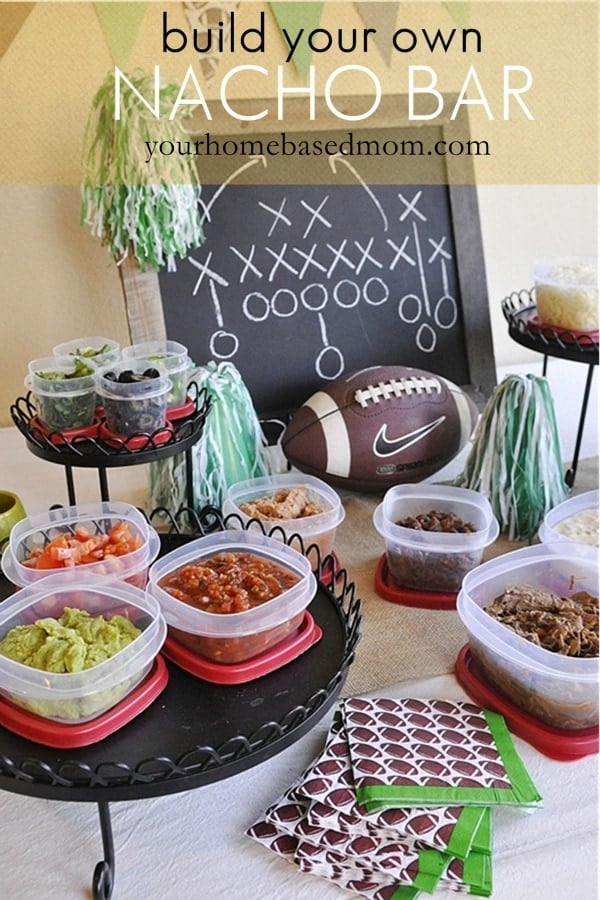
I will be pulling for the Ravens this year, mainly because I still love Terrance Cody and Courtney Upshaw (Roll Tide). If you're like me and scrambling to throw together a Super Bowl party on a small budget with even less time, check out these ideas for decor and crowd pleasing appetizers.
Showing posts with label furniture. Show all posts
Showing posts with label furniture. Show all posts
Tuesday, January 29, 2013
Super Bowl Party - Last Minute
I love to plan a good football party, but the last few weeks have really gotten away from me.





Friday, January 18, 2013
WW Favorite Friday - Barbacoa Beef
It's Friday! I hope you all had a great week. I was sick for the middle part of the week so I didn't get much blogging done. I did however manage to cook one night this week.
I made this Barbacoa Beef recipe from Skinny Taste.
It was a crock pot recipe so it instantly won points with me. She modeled this one after the dish at Chipotle. I have to admit, I have never tried it at Chipotle, mainly because the times I have been to Chipotle, I haven't made health conscious decisions, however this dish was really good.
We served this in carb-smart tortillas as tacos. Next time I will probably put it over rice with corn and black beans as she suggests. Also, next time I will go a little lighter on the spices. We love spicy foods but I think I got a little carried away. Maybe one less chipole pepper?
We will definitely be making this again. Huge shout out to Gina at SkinnyTaste.com for yet another awesome, healthy recipe!

I made this Barbacoa Beef recipe from Skinny Taste.
 |
| Barbacoa Beef- SkinnyTaste.com |
It was a crock pot recipe so it instantly won points with me. She modeled this one after the dish at Chipotle. I have to admit, I have never tried it at Chipotle, mainly because the times I have been to Chipotle, I haven't made health conscious decisions, however this dish was really good.
We served this in carb-smart tortillas as tacos. Next time I will probably put it over rice with corn and black beans as she suggests. Also, next time I will go a little lighter on the spices. We love spicy foods but I think I got a little carried away. Maybe one less chipole pepper?
We will definitely be making this again. Huge shout out to Gina at SkinnyTaste.com for yet another awesome, healthy recipe!

Monday, November 26, 2012
Festive Corn Casserole
Good afternoon! I hope you all had a great Thanksgiving. It was a beautiful day in Alabama, I hope your weather was as great as ours.
I tried a few new recipes this year that I would love to share with you. The first is a festive corn casserole that I actually made for the first time for Thanksgiving last year. I got this one from my former boss who brought it for an office pot luck. You see, I don't eat many (ok, any) veggies so the fact that I LOVED this corn casserole is a miracle and definitely worth posting.
The origional recipe is from Cooking Light so it isn't even bad for you! The origional artical can be found on MyRecipe.com but I have also included it here with my edits (in red).
I tried a few new recipes this year that I would love to share with you. The first is a festive corn casserole that I actually made for the first time for Thanksgiving last year. I got this one from my former boss who brought it for an office pot luck. You see, I don't eat many (ok, any) veggies so the fact that I LOVED this corn casserole is a miracle and definitely worth posting.
The origional recipe is from Cooking Light so it isn't even bad for you! The origional artical can be found on MyRecipe.com but I have also included it here with my edits (in red).
 |
Corn Fritter Casserole, Photo: Randy Mayor, Melanie J. ClarkeIngredients
Preparation
|
Wednesday, October 24, 2012
Gameday Crockpot Meatballs
Happy Humpday! I hope you all are having a great week.
I am very excited to post about these meatballs that I made for the game on Saturday. As I've mentioned before, we love to tailgate. This week, being an away game for our beloved Crimson Tide, we decided to take our tailgating outside to the driveway. Redneck? Maybe, Fun? Heck yes!

I'd like to give a big thanks to our friends at Farm Rich for sending a free coupon to check out their products. They have a great selection of frozen snack foods that you can either heat up or include in a recipe. This was the perfect opportunity to try out a recipe I had been thinking about.
.JPG)
I used the Farm Rich Italian Style Meatballs (they also have turkey meatballs!!) for this recipe. Most of the stuff I already had around the house so this was a great easy to put together snack.
 Crockpot Meatballs
1 bag frozen meatballs
12 oz ketchup
1 cup brown sugar
1tsp salt
1 tsp garlic
1 tbsp worcestershire
1/2 tsp soy sauce
Mix all wet ingreadients in a mixing bowl. Add seasonings. Empty bag of meatballs into crock pot. Pour sauce over meatballs. Stir until meatballs are coated. Cook on high for 3-4 hours. Serve warm.
These really turned out GREAT. I'm pretty sure everyone went back for seconds. Best of all, they were easy peasy!!
Want to try this recipe?? Enter to win a certificate to try out a Farm Rich product for yourself!
a Rafflecopter giveaway

I am very excited to post about these meatballs that I made for the game on Saturday. As I've mentioned before, we love to tailgate. This week, being an away game for our beloved Crimson Tide, we decided to take our tailgating outside to the driveway. Redneck? Maybe, Fun? Heck yes!


I'd like to give a big thanks to our friends at Farm Rich for sending a free coupon to check out their products. They have a great selection of frozen snack foods that you can either heat up or include in a recipe. This was the perfect opportunity to try out a recipe I had been thinking about.
.JPG)
I used the Farm Rich Italian Style Meatballs (they also have turkey meatballs!!) for this recipe. Most of the stuff I already had around the house so this was a great easy to put together snack.
 Crockpot Meatballs
1 bag frozen meatballs
12 oz ketchup
1 cup brown sugar
1tsp salt
1 tsp garlic
1 tbsp worcestershire
1/2 tsp soy sauce
Mix all wet ingreadients in a mixing bowl. Add seasonings. Empty bag of meatballs into crock pot. Pour sauce over meatballs. Stir until meatballs are coated. Cook on high for 3-4 hours. Serve warm.
These really turned out GREAT. I'm pretty sure everyone went back for seconds. Best of all, they were easy peasy!!
Want to try this recipe?? Enter to win a certificate to try out a Farm Rich product for yourself!
a Rafflecopter giveaway
Tuesday, September 18, 2012
Early Birthday Present = More DIY projects!
This weekend I got an early birthday present from my mom. I got this!
My husband pokes fun at me sometimes because I had rather use power tools than a sewing machine. Maybe I'm a tomboy at heart, or maybe it's because I've fallen in love with http://www.ana-white.com (or maybe it's because I STINK at sewing) but none the less, I love the smell of sawdust and I love the end product.
I have been wanting some power tools ever since my FIL and I built a bench for my back patio (I have yet to post about it...slacker, I know) I really went back and forth between a circular saw and a jigsaw but finally settled on a circular saw. The drawback with a circular saw is that you can only cut a straight line which rules out making those cute decorative picture frames, but the drawback with a jig saw is that you can only cut to a depth of 1 inch.
I have so many projects that I want to do that I don't even know where to start!
I am thinking about starting with this one from Country Girl Home


My husband pokes fun at me sometimes because I had rather use power tools than a sewing machine. Maybe I'm a tomboy at heart, or maybe it's because I've fallen in love with http://www.ana-white.com (or maybe it's because I STINK at sewing) but none the less, I love the smell of sawdust and I love the end product.
I have been wanting some power tools ever since my FIL and I built a bench for my back patio (I have yet to post about it...slacker, I know) I really went back and forth between a circular saw and a jigsaw but finally settled on a circular saw. The drawback with a circular saw is that you can only cut a straight line which rules out making those cute decorative picture frames, but the drawback with a jig saw is that you can only cut to a depth of 1 inch.
I have so many projects that I want to do that I don't even know where to start!
I am thinking about starting with this one from Country Girl Home

Or maybe with this coffee table from Pink and Polka Dot that I've had my eye on.

Hers is a refinished one but I could do this Ana-White.com plan and add decorative legs and paint it with these colors to match the desk I refinished.
Hopefully in the next couple of weekends I'll be able to start one of these! I can't wait!
Do you have any favorite power tool projects? I'd love to hear about them! I'm always looking for ideas!
Sunday, July 22, 2012
Coffee Table Redo DIY
I have hated our coffee table since the day we got it. As I mentioned in my last post, we bought our house furnished. We sold most of the stuff but we didn't have coffee tables so we kept the ones that came in the house. .
 It's not that it is a particularly bad coffee table, but it has a glass top. With two dogs in the house (and a husband ;) ), the glass is ALWAYS dirty. I could Windex that thing two or three times a week and still not keep up.
I found a few DIY coffee tables on Pintrest that I absolutely LOVED and the design of all of them were pretty much the same; white bottom with a dark wooden top. Since I don't really have the tools to make a coffee table at my house (I could REALLY use a small saw, *hint*hint* if my hubby reads this ;) ) So I decided to see what I could come up with using my existing table.
 I measured the glass to find that it was 4'x2' so off to Lowes I went. I bought two 8 ft. 1"x6" boards and had them cut them in half. I also bought two 2ft boards in the craft wood section to use as the support underneath. When I got home, I lined the boards up across the table frame and used Gorilla Wood Glue to glue the planks together. Then, I put the glass on the top of all of it and let it sit over night. The next morning, I added the 2ft boards across the ends for stability. (I really think I could have done with out this, and will skip it when I do the side tables.)
 I let it all dry and started to screw the planks to the support piece but my screws ended up being too long. After a trip back to Lowes for more screws, we came back and the new ones were STILL too long. (I knew; we needed 1" but someone wouldn't listen :) ) I ended up just using wood putty to fill in the hole and left it with just the glue. If you've never used Gorilla Glue, I highly recommend it for any DIY project involving wood. It's pretty much miracle paste.
Finally I stained the top (Minwax Jacobean) and spray painted the base with a good spray paint with a primer built in. I let the stain sit a little longer than I should. It is a little too dark but it's still WAY better than the glass. I also put a layer of Semi- Gloss Poly on top.
One day I will make a complete new one, but for $30 and an afternoon, this one will do for a while! Also, I think it looks great with my red couch and yellow walls.
.


I found a few DIY coffee tables on Pintrest that I absolutely LOVED and the design of all of them were pretty much the same; white bottom with a dark wooden top. Since I don't really have the tools to make a coffee table at my house (I could REALLY use a small saw, *hint*hint* if my hubby reads this ;) ) So I decided to see what I could come up with using my existing table.
 I measured the glass to find that it was 4'x2' so off to Lowes I went. I bought two 8 ft. 1"x6" boards and had them cut them in half. I also bought two 2ft boards in the craft wood section to use as the support underneath. When I got home, I lined the boards up across the table frame and used Gorilla Wood Glue to glue the planks together. Then, I put the glass on the top of all of it and let it sit over night. The next morning, I added the 2ft boards across the ends for stability. (I really think I could have done with out this, and will skip it when I do the side tables.)
Finally I stained the top (Minwax Jacobean) and spray painted the base with a good spray paint with a primer built in. I let the stain sit a little longer than I should. It is a little too dark but it's still WAY better than the glass. I also put a layer of Semi- Gloss Poly on top.
One day I will make a complete new one, but for $30 and an afternoon, this one will do for a while! Also, I think it looks great with my red couch and yellow walls.
.

Now I have to find something to decorate it with. My black candle holders that I kept on the glass won't show up anymore. Off to search the web for ideas! I'll post an update when I find something.
See that side table on the left? It's next!
PS. I bought those wonderful pillows the other day at Marshall's for $20 for the set. I love that place.
Thanks for reading!
Amanda
Shared on: Making the World Cuter , Skip to My Lou, Tater Tots and Jello
Monday, March 26, 2012
Desk Redo - Reveal

One word of warning, my $20 desk quickly turned into a $50 desk. I know that still isn't a bad price, but I didn't realize how quickly it would add up. We just moved into our house back in August so of course starting out we don't have some of the supplies that most people probably have lying around so I had to start from scratch.

 Next, I sprayed a gray primer over everything but the top of the desk. I really struggled on what to do first because I didn't want to get stain on the primer but I didn't want to get primer on the stain either. Finally I covered the top with a garbage bag and spray primed the rest of the desk. Then I used the smallest can of MinWax stain in Jacobean to stain the top. I left it on for the full 15 mins and then took it off with a soft cloth. I let it dry overnight.
Then I put two coats of latex paint in Tantalizing Teal. I bought a Valspar 8 oz. Paint Samplefor $3 and it was more than enough for two coats.
TADA!!!
I didn't change the hardware because it actually matched the top perfectly.
I am THRILLED with the results and I can't wait to use my beautiful desk. Not bad for a "first timer" if you ask me!
I also painted the walls in the craft room gray this weekend. I can't wait to get it all put together and then share pics with you all.
** I was in no way paid for mentioning the products in this blog, I just loved them so I thought I'd pass them along**
Linked up with Making The World Cuter (as my entry into their give-away)
Friday, March 23, 2012
Desk Revamp
For a while now, I have been wanting to get into furniture refinishing. I 100% blame pintrest and linky parties for this new adventure. I keep reading and seeing pictures of how you ladies find furniture for $5 and turn it into a million bucks. I have been scouring CraigsList, yard sales, and thrift stores for months but can never seem to find deals like those. FINALLY last week I stumbled upon this desk on CraigsList for $20. Yay!

It took me almost a week to get it, first because on my way to pick it up it came a monsoon, then because when I got there the lady had locked herself out of the house, then she lost her phone.... Anyway, Tuesday, I finally was able to switch cars with my husband and go pick it up.
This will be my first furniture redo so I am a little nervous. I am the type that when I decide I am going to do something I research and research and research some more. I have read countless blogs on how to refinish furniture and I now believe I am a professional. :)
Here are a few of my inspiration pieces...
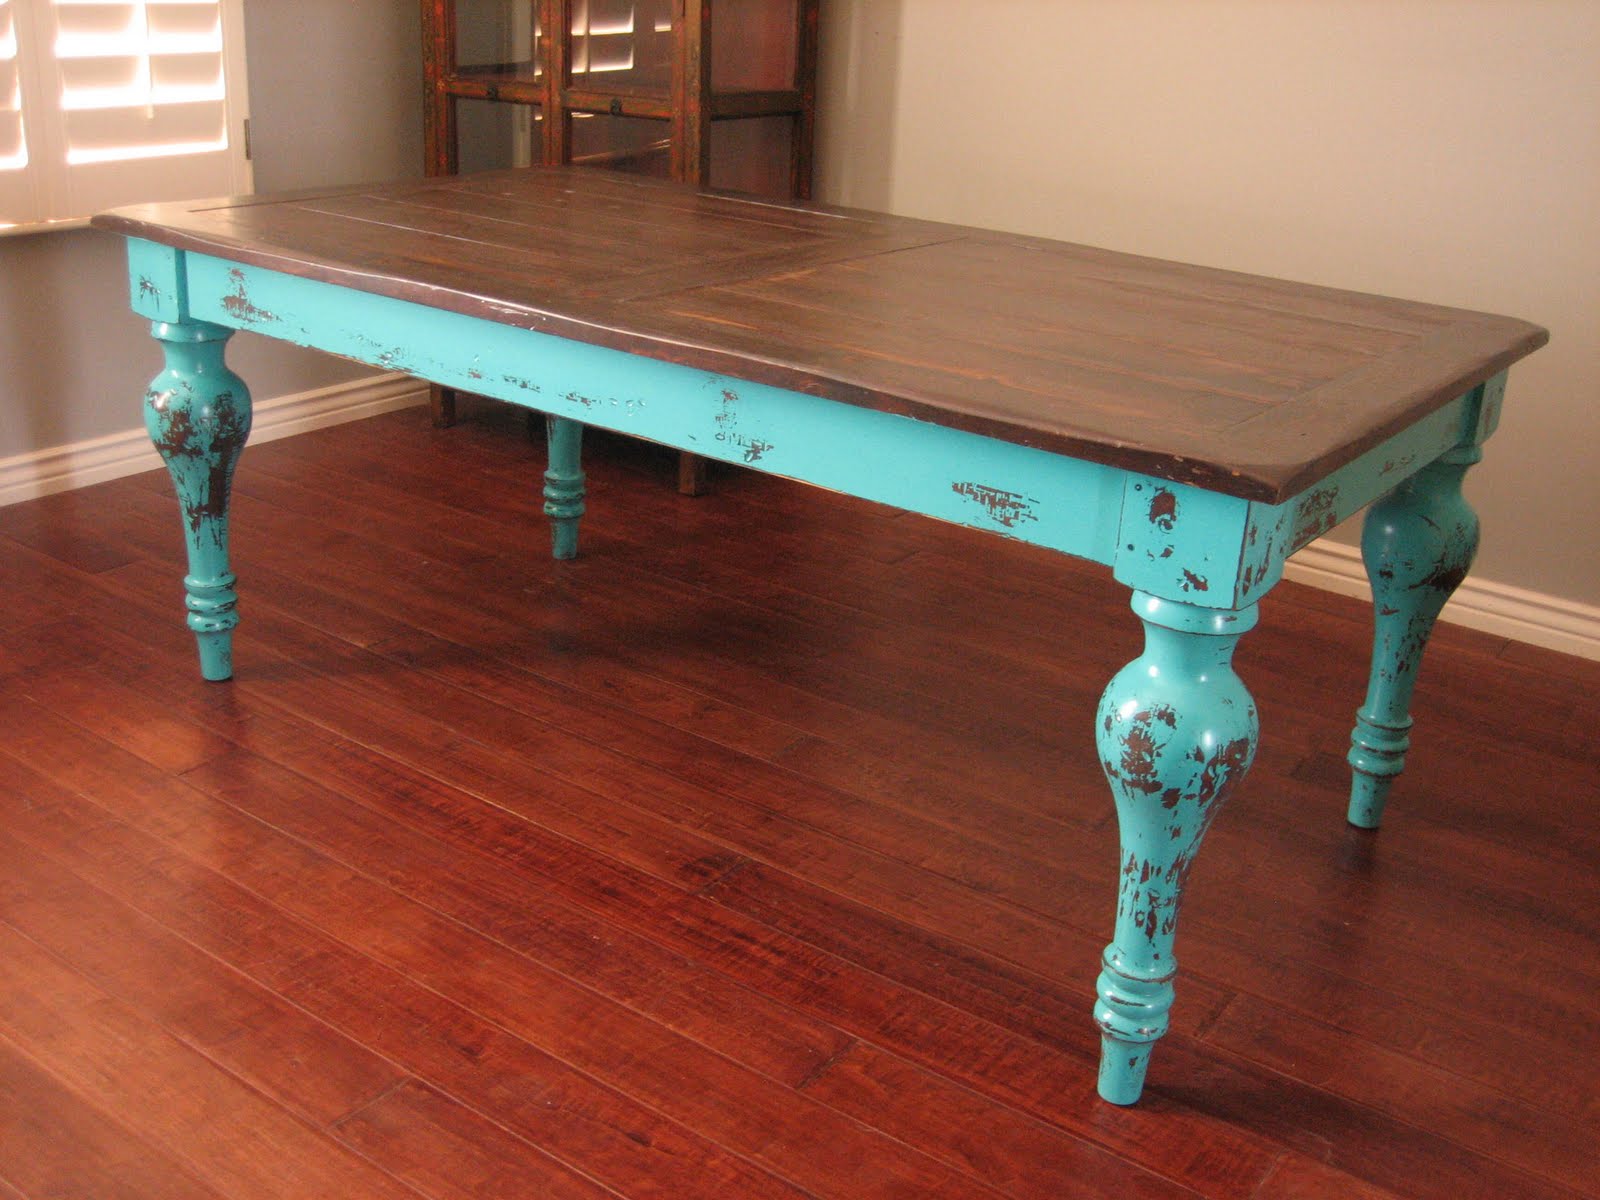
I really love the colors on this table. I bought turquoise and a dark stain to recreate this effect.
 Don't you just LOVE the distressing?? Actually, my DH hates it. He thinks it looks "imperfect" but I think that's the beauty! :)
I have a three day weekend this weekend so I'm hoping to finish it up and post it for all of you to see! Wish me luck! If you have an advice or suggestions I would love to hear from you!
It took me almost a week to get it, first because on my way to pick it up it came a monsoon, then because when I got there the lady had locked herself out of the house, then she lost her phone.... Anyway, Tuesday, I finally was able to switch cars with my husband and go pick it up.
This will be my first furniture redo so I am a little nervous. I am the type that when I decide I am going to do something I research and research and research some more. I have read countless blogs on how to refinish furniture and I now believe I am a professional. :)
Here are a few of my inspiration pieces...
I really love the colors on this table. I bought turquoise and a dark stain to recreate this effect.
 |

I have a three day weekend this weekend so I'm hoping to finish it up and post it for all of you to see! Wish me luck! If you have an advice or suggestions I would love to hear from you!
Subscribe to:
Posts (Atom)